How to take a screenshot on your Mac
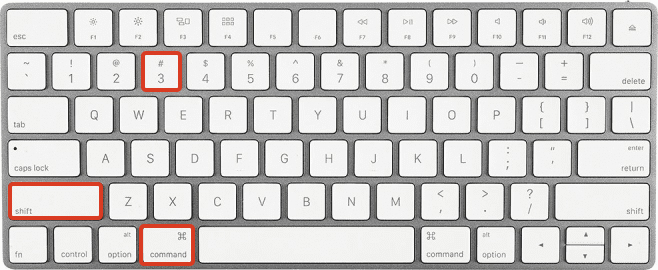
Step 1: Press the Command + Shift + 3 keys simultaneously.
Step 2: That will save a copy of your screen to your clipboard. You can alternatively press the same combination without the “Command” key in order to save the image as a PNG file to your desktop.
How do I take a partial screenshot?
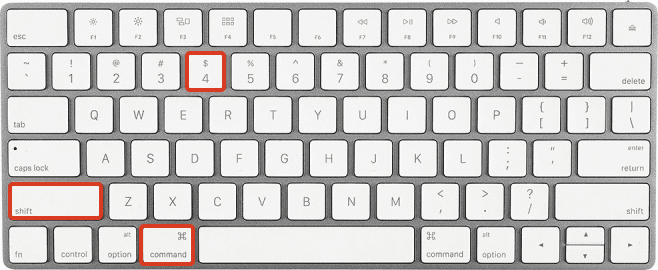
Step 1: Press the Command + Shift + 4 keys simultaneously.
Step 2: Use your mouse to draw a rectangle in order to specify what to capture – or press the spacebar and then click on something (e.g. a window) to capture it. Your Mac then saves it as a file on the desktop.
How do I take a screenshot of the Touch Bar (MacBook Pro)?
Step 1: Press the Command + Shift + 4 keys simultaneously.
Step 2: Your Mac captures the entire Touch Bar and saves it as a file on the desktop..
How to take a screenshot in Windows 10, 8 and 7?
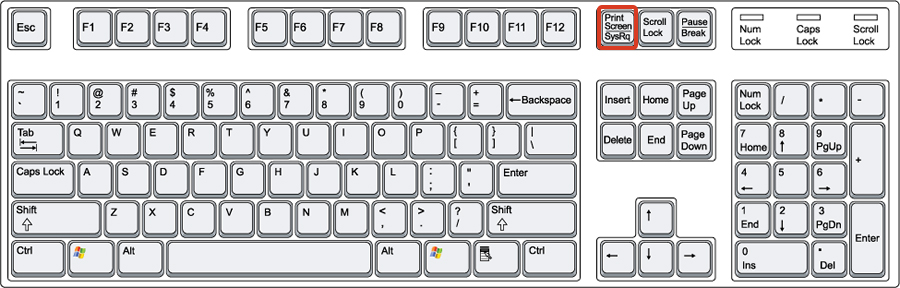
Step 2: Windows will save a copy of your screen to your clipboard. Note: On some notebooks you have to hold Fn key and then press PrtScn instead.
Step3: To insert the image into a document, press and hold down the Control and V keys. Then, your screen capture will be pasted into your document.
How to take a screenshot of the entire screen in Windows 10?
Step1: Press Windows key + PrtScrn.
Step2: Now go to the Pictures library on your computer by launching Explorer (Windows key + e) and in the left pane click Pictures.
How to screenshot on Windows 10, 8, and 7 with the Snipping Tool
Step 1: Press on the windows icon in the lower-left corner of your screen.
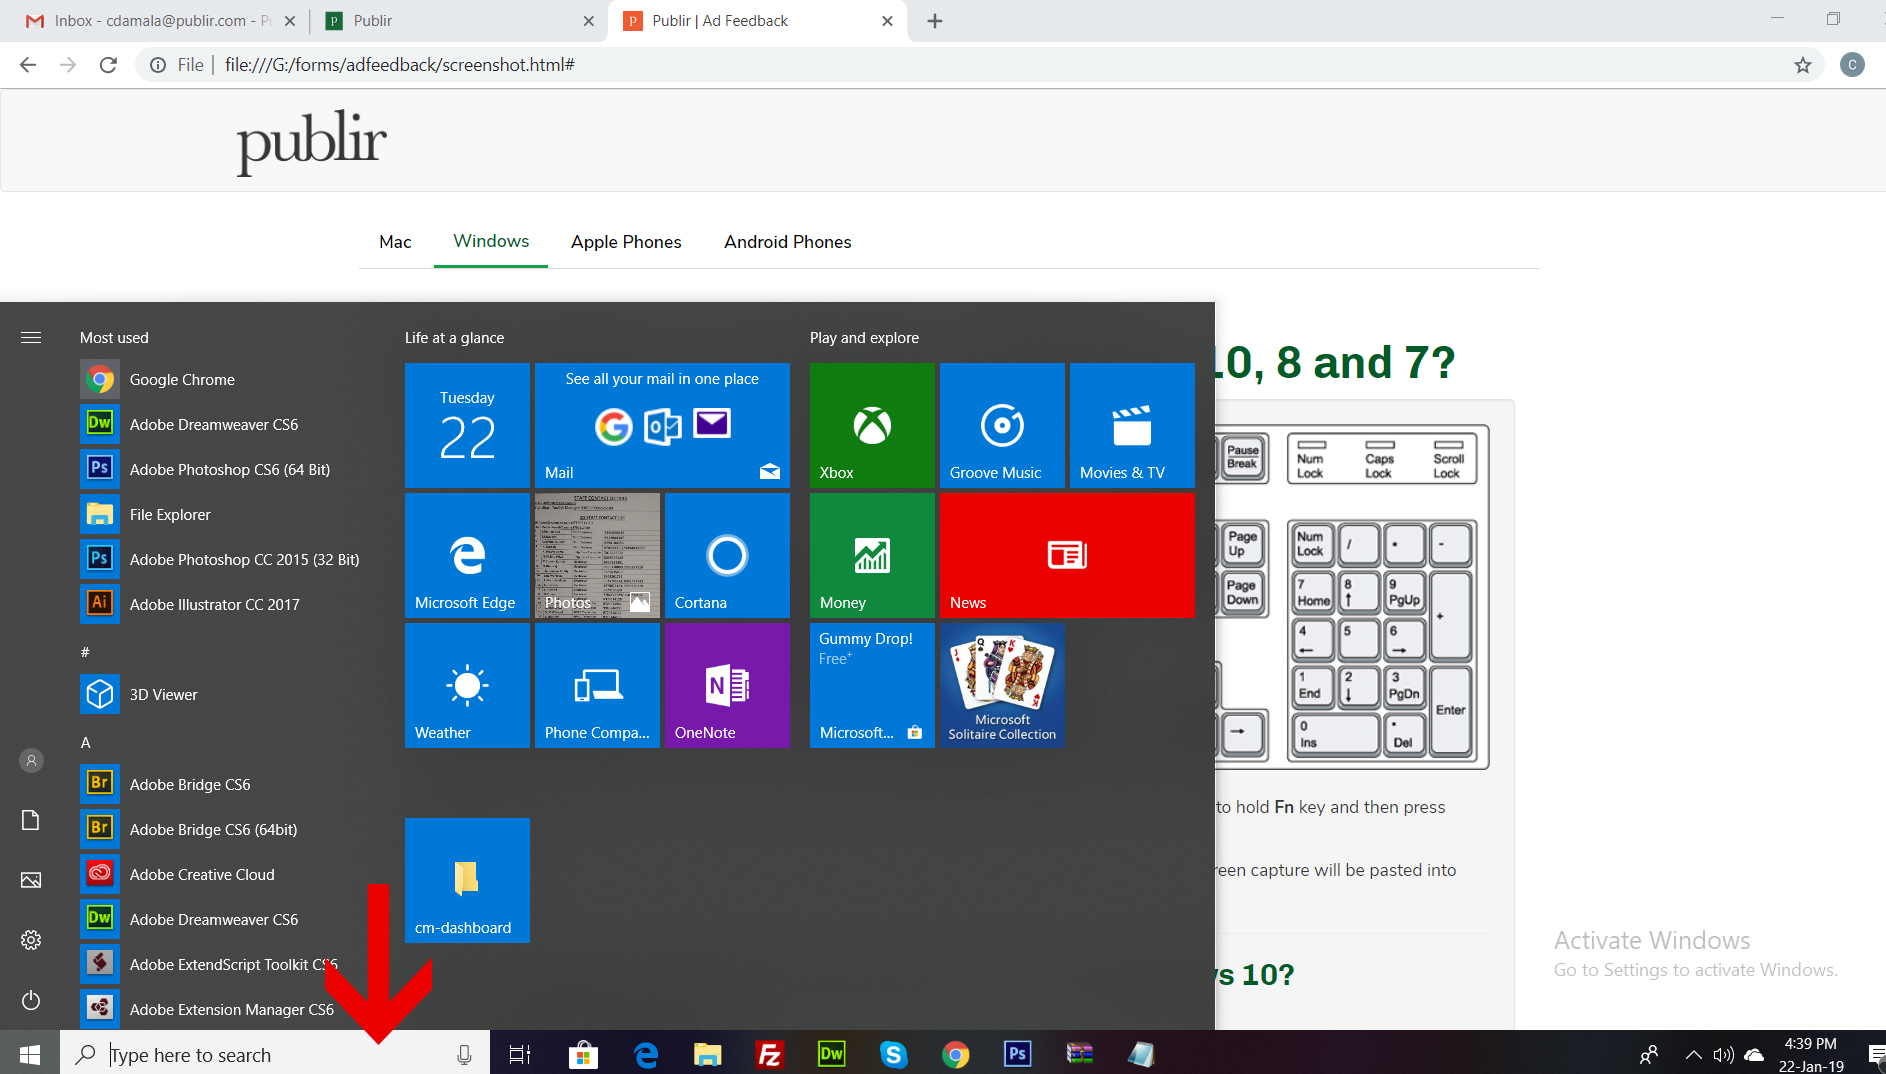
Step 2: In the search bar that appears, type “Snipping Tool.”

Step 3: Click on the Snipping Tool button that appears. Then a window for the program will appear on your screen.

Step 4: Click on the word “New,” located in the Snipping Tool window. Once you do, your screen outside of the Snipping Tool window will become faded. As you move your mouse, you will see a crosshair appear.

Step 5: Position the crosshair in the corner of the area you would like to screenshot. Then, click and drag your mouse across the portion of your screen you are capturing. When you release your mouse, you will have taken the screenshot.

Once your screen grab is captured, it’s time to add any annotations and save the file.
How to screenshot on iPhone X, iPhone XS, iPhone XS Max, and iPhone XR?

Step 1: Open the app or screen you want to capture.
Step 2: Set up exactly the way you want it for the shot.
Step 3: Press and hold the Side button on the right side of iPhone and click the volume Up button at the exact same time. The screen will flash white and you'll hear the camera shutter sound(if your sound is enabled).
How to take a screenshot on the iPhone 8 and iPhone 8 Plus?

Step 1: Open the app you want to screenshot and go to the exact screen you want to capture.
Step 2: Press and hold the Power button on the right side and click the Home button at the exact same time.
Step 3: The screen will flash white and you'll hear the camera shutter sound.
Step 4: If you're on iOS 10 or earlier, the screenshot will be saved to your All Photos album.
How to take a screenshot on the iPhone 8 and iPhone 8 Plus?
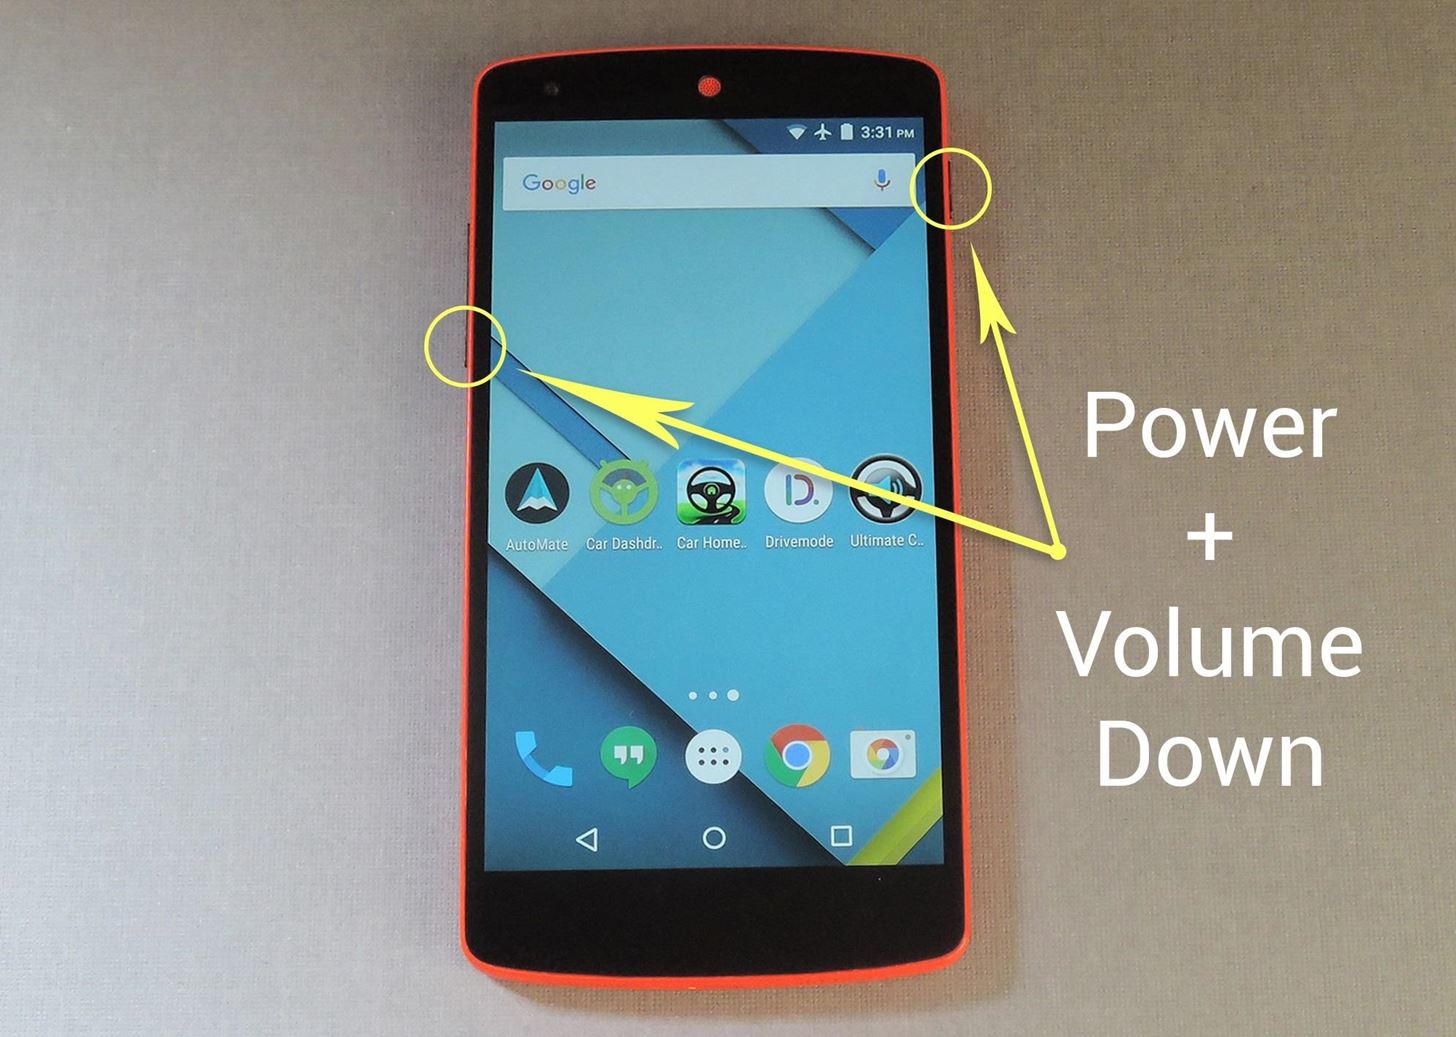
Take a screenshot
Step 1: Open the screen that you want to capture.
Step 2: Press the Power button for a few seconds. Then tap Screenshot.
Step 3: If that doesn't work, press and hold the Power and Volume down buttons at the same time for a few seconds.
Step 4: Your device will take a picture of the screen and save it.
Step 5: At the top of the screen, you'll see Screenshot capture Screenshot.
Tip: If you don't see the Screenshot capture icon, return to a Home screen to see it.
View your screenshot
Step 1: Swipe down from the top of a screen with the Screenshot capture.
Step 2: Tap the "Screenshot saved" notification.
To see all your screenshots
Open your device's Photos app > Tap Menu > Tap Device folders and then Screenshots.
Note: If you don't have the Photos app, you're likely running an older Android version. Open your device's Gallery app > Album view > Screenshots folder.